


10 DIY CHRISTMAS DECORATION TO MAKE YOUR HOME MERRY AND BRIGHT WITH CRICUT DESIGN OF LIGHTBOXGOODMAN (PART 2) - Lightboxgoodman
6. Make Ice Lanterns:
How cool does it sound? These ice lanterns are pretty, festive and just require water, plastic containers and a chill in the air.

Materials Needed:
- water
- medium to large plastic containers
- plastic cups
- evergreen sprigs and/or winter berries (optional)
- tea lights/pillar candles
- lighter
Pour Water into Containers
Fill a small plastic cup with water and put inside a larger plastic container. Fill large plastic container with water. As an option, add evergreen sprigs and/or berries to water to add some color and texture. Carefully put inside a freezer (or outside if temperatures are below freezing.) Allow it to freeze for several hours or overnight.
Tip: The size and shape of the lanterns are only limited by the containers you find. Try making two huge ones to flank a front door by using 5 gallon buckets and large pillar candles.

Unmold Lanterns
Run warm water over outside of large plastic container to unmold lantern. The ice may crack, but the cracks look beautiful against the candlelight. Set outside and insert tea light candle or pillar candle that will fit inside ice lantern. (Never leave candles unattended).

7. Create an Indoor Snowstorm
How about some Kirigami? For paper art lover only! Deck the windows with strands of snowflakes. They're inexpensive, easy to make and add the perfect dose of seasonal flair to even the smallest windows.

Materials Needed:
- several sheets of plain white copy paper
- computer and printer
- one heavy book
- scissors
- 8 lb. fishing line
- transparent tape
Print Snowflakes
Search the Internet for free snowflake templates, and print out several different sizes.

Cut Snowflakes
Use scissors to cut around the outside border of each snowflake.

Fold Snowflakes
Fold each snowflake along the specified lines.

Cut Snowflakes
Use scissors to cut out the shaded parts of each snowflake.

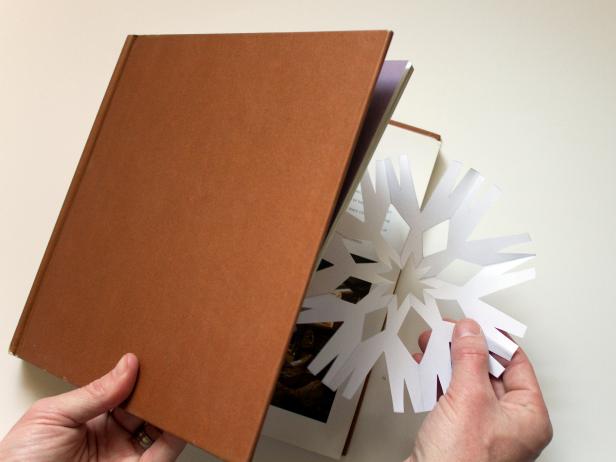
Flatten Snowflakes
Place each of the snowflakes between various pages of a very heavy book to flatten out all of the folds.
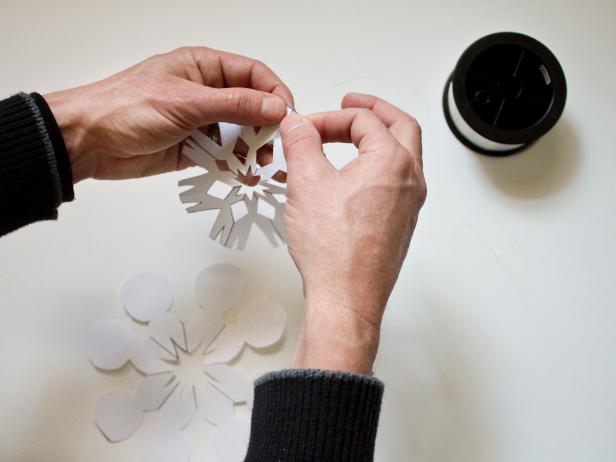
Attach Snowflakes
Use small pieces of transparent tape to attach each of the snowflakes, at various heights, to several lengths of 8 lb. fishing line. Helpful hint: Measure the distance between the inside top of the window frame and the inside bottom of the window frame to determine the correct length of fishing line.
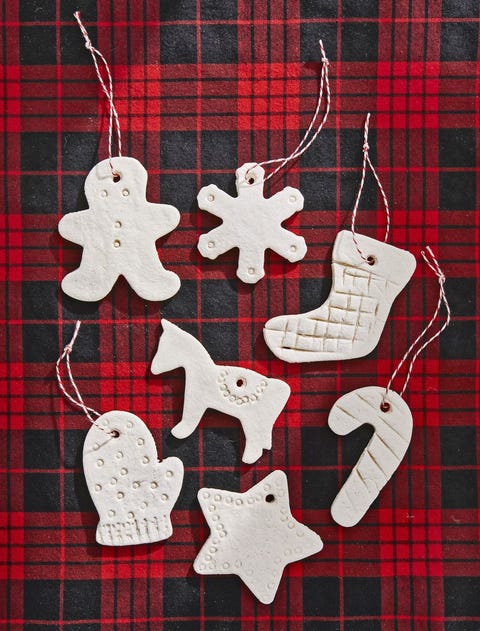
8. Salt Dough Ornaments
These handmade ornaments will take you right back to Grandma's house. To make your own, combine 4 cups all-purpose flour, 1 cup salt, and 1 1/2 cups of warm water in a mixing bowl. Knead until the dough is firm and smooth. Roll out dough and cut desired shapes (use a straw to poke a hole for hanging). Bake at 300°F until dry, approximately 1 hour; cool completely.
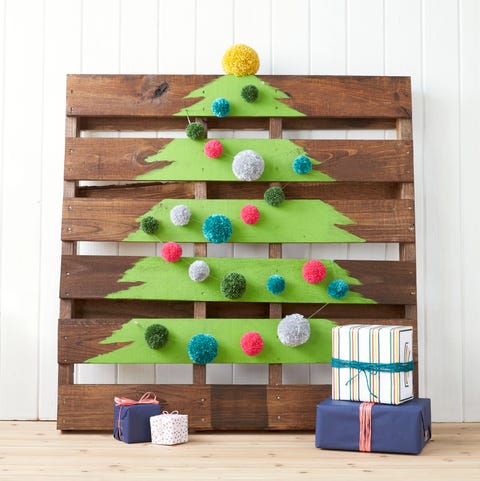
9. Wood Pallet Tree
Paint a tree on a shipping crate (you can find 'em for cheap on eBay or at the hardware store), and embellish the slats with pom-poms.
10. Coin Envelope Advent Calendar
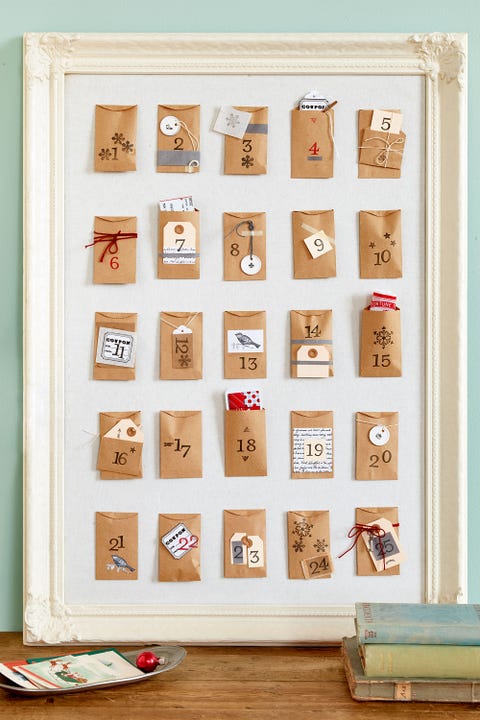
Count down the days until Christmas with little paper envelopes, sized to hold all sorts of surprises: candy, tickets, tiny toys. Use rubber stamps to ink the dates on the envelopes. You can also embellish them by adding tags, string, and washi tape. Then, simply pin the envelopes on a pretty corkboard.
OR YOU CAN JUST PURCHASE OUR AWESOME DESIGNS THEN GET YOUR OWN DIY DECORATION!

Read more about our 4 famous how-tos:
- HOW TO MAKE PAPER CUT LIGHT BOX!
- How To Use BOGO Code
- HOW TO MAKE A POP-UP LIGHTBOX
- How To Put SVG files To Your Cricut Space From Zip Files Without Extract Sofware
Explore about materials to create a beautiful lightbox:
- What Do You Need To Know About The Spacer?
- ALL ABOUT SIZE OF POP-UP DESIGN TEMPLATE
- ALL KIND OF ART KNIVES!
Useful tips maybe you didn't know:
- A LITTLE TRICK TO HOLD SMALL DETAIL IN PLACE
- Commonly Used LED Color Schemes For Shadow Box
- Easy Way To Mix More Colors Led Trip And Connect More Leds Strip Without Soldering!
And more interesting information in our blog: Read more here