


Why Is My Cricut Not Cutting Cleanly? Causes & Solutions - LightboxGoodman
LEARN HOW TO GET THE CLEANEST CUTS POSSIBLE ON YOUR CRICUT WITH THESE HELPFUL TROUBLESHOOTING TIPS!
The Cricut cutting machine is an amazing invention. It lets us create SO many beautiful things. But sometimes, the cuts aren’t as clean as we’d like, and it’s not always obvious WHY or what we should do to fix it. So today I’m going to go over the five things you need to pay attention to when cutting on your Cricut Explore or Cricut Maker. With this, you can fix nearly any Cricut cutting problem and create those beautiful, clean cuts!
Post shared by LightboxGoodman.
Click here to view our products and make a purchase. LightboxGoodman is grateful for that

The five things to pay attention to are your MAT, BLADE, MATERIAL, SETTING, and PATTERN. And that’s the exact order I go in when I’m troubleshooting a cutting problem, too.
#1. Use A Sticky Mat
Your Cricut mat needs to be pretty sticky in order to get clean cuts. So if your cuts aren’t clean, the first thing you should do is change your mat. I usually switch to a new or newer mat and it solves my problem right away. If you can’t afford a new mat, you can try washing your mat with dishwashing soap and allowing it to air dry to get it stickier, but I’ll be honest — it might still not be sticky enough. A sticky mat can make all the difference. And, in fact, I prefer the green mats over the blue mats.
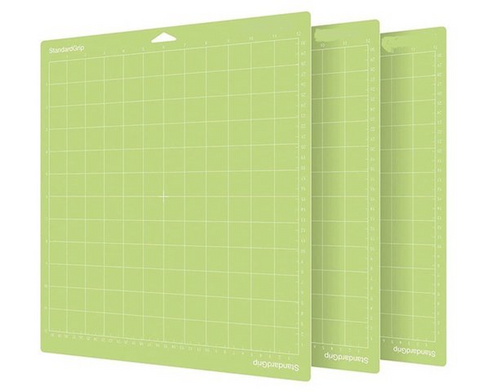
I rarely use the purple StrongGrip mats, however, unless I’m cutting some really thick material. Green mats are my friend!
If you guys want to learn more about mat, leave comments below!
#2. Use A Clean, Sharp Blade
You need to make sure your Cricut blade is clean and sharp. I do this by taking a sheet of aluminum foil and balling it up like this. Then I remove the blade from its housing, depress the plunger, and stick it in and out of the aluminum ball CAREFULLY over and over — maybe 50 times. This cleans any debris from the blade, like bits of paper or vinyl that might be stuck to the blade, and also seems to sharpen it. (It may not actually be sharpening it, but it works!)

This technique works for the Fine-Point and Deep-Point Blades. This technique works GREAT for me and I haven’t had to buy a new blade in over a year. I always do this to my blades when I’m about to cut something with really intricate cuts.
If your problem is not that your blade isn’t cutting all the way through but rather that it’s cutting TOO MUCH, it may be that you’re using the wrong blade. Check your packaging — you need to use the Premium Fine-Point (German Carbide) blade with the Cricut Explore and Cricut Maker. The Premium Fine-Point Blades can be identified out of their packaging by the color of the caps, either WHITE or RED. Do not use the gray cap blades — they are made for older Cricut machines and are too long for the Cricut Explores and Makers.

#3. Use Quality Materials
Your material can make a big difference in how it cuts, too. For example, not all paper is created equal. If the fibers are weaker or shorter in the paper, which you usually find in lower quality paper, you’ll get more tearing. So if your paper doesn’t seem to be cutting well even after using a sticky mat and a clean blade, the paper itself could be the culprit. There have been many times when I’ve had an issue and then changed to a new paper only to have everything work perfectly. Cricut paper is high quality, so is Recollections. Stay away from Park Lane brand (sorry!). So before you give up on that project, try a new paper!

Tip: If you use textured paper, put your paper textured side UP on your mat for the best cuts!!
#4. Check Your Settings
It’s really important that you’ve got the right settings for your material. I find it works best to indicate the material settings in Cricut Design Space rather than on your Cricut dial. To do this on a Cricut Explore, just rotate the dial to Custom and you’ll be prompted to choose your material before you cut it. (Note that the Maker has no dial — you are on “customer settings” by default.) And if that still doesn’t seem to help, try increasing the pressure of your cut. This is why I almost always have “More” pressure on my cuts — it seems to always help me get those clean cuts.
Tip: Sometimes when everything else seems right it can help to turn your custom settings to “Washi Tape” — this seems to work best on intricate cuts on vinyl.
#5. Check Your Pattern
Not all patterns are going to cut cleanly. The smaller and more detailed and intricate they are, the harder it’s going to be to cut them. Sometimes, they are just too small. So you can try making them larger if that is an option. If that doesn’t work or is not an option, you can try setting your material to Intricate Cuts if you’re cutting cardstock. Or try the washi tape setting if you’re cutting vinyl. Neither of these are guaranteed to work, but it’s worth a try. In the end, some pattern may just be too tiny or detailed to be cut without issues. This doesn’t mean all is lost, however — you may still be able to cut it and just clean it up with scissors or a knife later.

These are all the tips I use each time I go to cut something, and I nearly always have clean cuts on all three of my Cricuts because of it. It does require a certain mindset — you have to go into a project knowing you might need to tinker with it a bit to get it to cut properly. Testing can help a LOT. The key is not to give up. Be persistent and try new things. It really always works for me!
If you need more help with your Cricut cutting problems, please visit my amazing Papercut Facebook group so we can all help you out!
For more awesome papercut designs, visit us: https://lightboxgoodman.com/
Read more about our 4 famous how-tos:
- HOW TO MAKE PAPER CUT LIGHT BOX!
- How To Use BOGO Code
- HOW TO MAKE A POP-UP LIGHTBOX
- How To Put SVG files To Your Cricut Space From Zip Files Without Extract Software
Explore about materials to create a beautiful lightbox:
- What Do You Need To Know About The Spacer?
- ALL ABOUT SIZE OF POP-UP DESIGN TEMPLATE
- ALL KIND OF ART KNIVES!
Useful tips maybe you didn't know:
- A LITTLE TRICK TO HOLD SMALL DETAIL IN PLACE
- Commonly Used LED Color Schemes For Shadow Box
- Easy Way To Mix More Colors Led Trip And Connect More Leds Strip Without Soldering!
And more interesting information in our blog: Read more here
https://designspace.space/
Wow Evan! This is excellent! Thanks for taking the time.